Top Open Source Alternatives to Tonic AI for Data Anonymization and Synthetic Data
Top Open Source Alternatives to Tonic AI for Data Anonymization and Synthetic Data
March 31st, 2025

AWS RDS is a relational database service from AWS that is easy to set up and scale. It's used by thousands of companies across the world.
In this guide, we're going to walk through how you can seed your RDS database with synthetic data for testing and rapid development using Neosync. Neosync is an open source synthetic data orchestration company that can create anonymized or synthetic data and sync it across all of your rds environments for better security, privacy and development.
Let's jump in.
We're going to need an AWS account and a Neosync account. If you don't already have those, we can get those here:
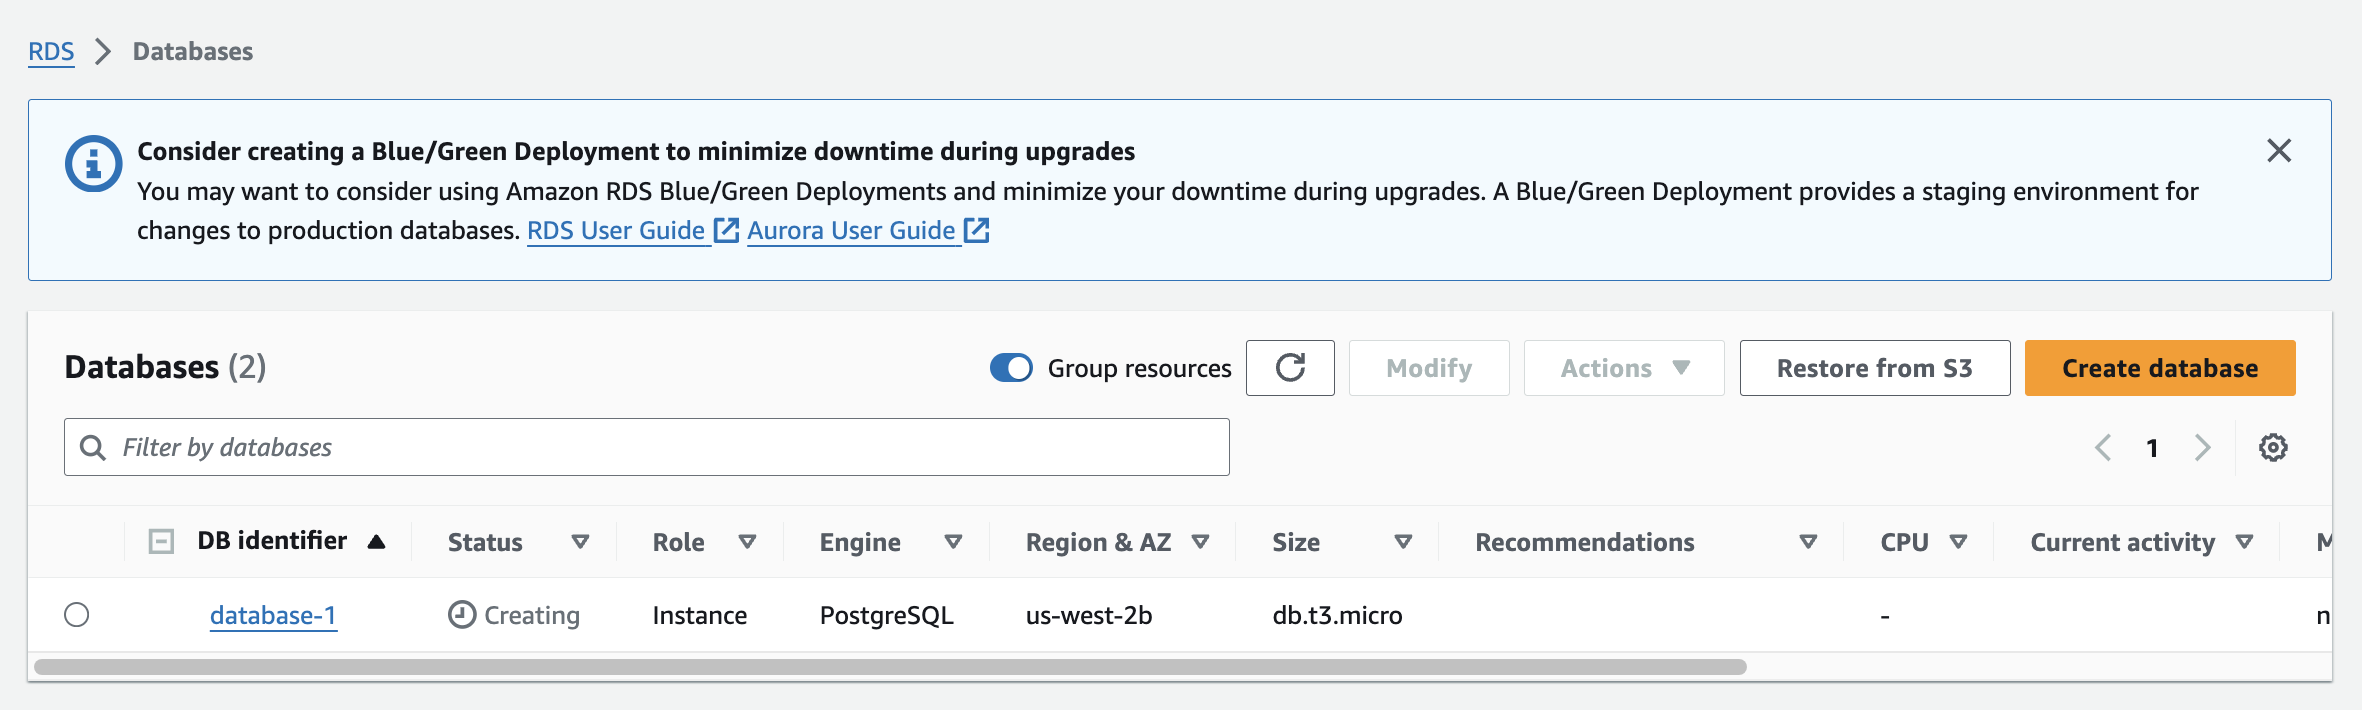
Now that we have our accounts, we can get this ball rolling. First, let's log into our AWS console and create a new RDS instance. For this guide, we're going to create a PostgreSQL database and select basic options that will suffice for a Dev DB. If you're creating a production database, you'll likely want to optimize your RDS instance for better memory, security and Storage.
For our RDS instance, we're going to create a PostgreSQL database. Here are my configurations:
Everything else you can leave as the default. Click "Create Database" to create your database.
Once our database has been created we can connect to it using a database client. I use DBeaver but you can use any client that you'd like.
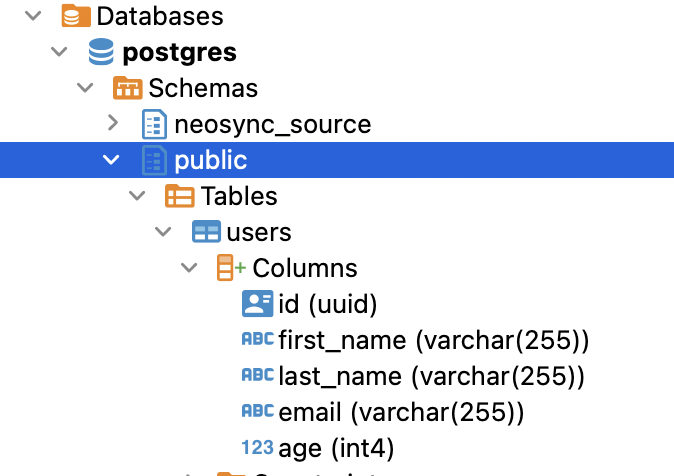
Next, we'll need to define our database schema. For this demo, we'll create one table but you can create as many tables as you need to.
Here is the SQL script I ran to create our table in the public schema. If you have the uuid() extension installed you can also set the id column to auto-generate those for you or you can use Neosync to generate them. Let's create our table.
CREATE TABLE public.users (
    id UUID PRIMARY KEY,
    first_name VARCHAR(255) NOT NULL,
    last_name VARCHAR(255) NOT NULL,
    email VARCHAR(255) NOT NULL,
    age INTEGER NOT NULL
);
We can do a quick sanity check by querying to see that our table was successfully created.
Nice! Easy enough to get started.
Next let's set up Neosync.
Navigate over to Neosync and login. Once you're logged in, go to to Connections -> New Connection then click on Postgres.
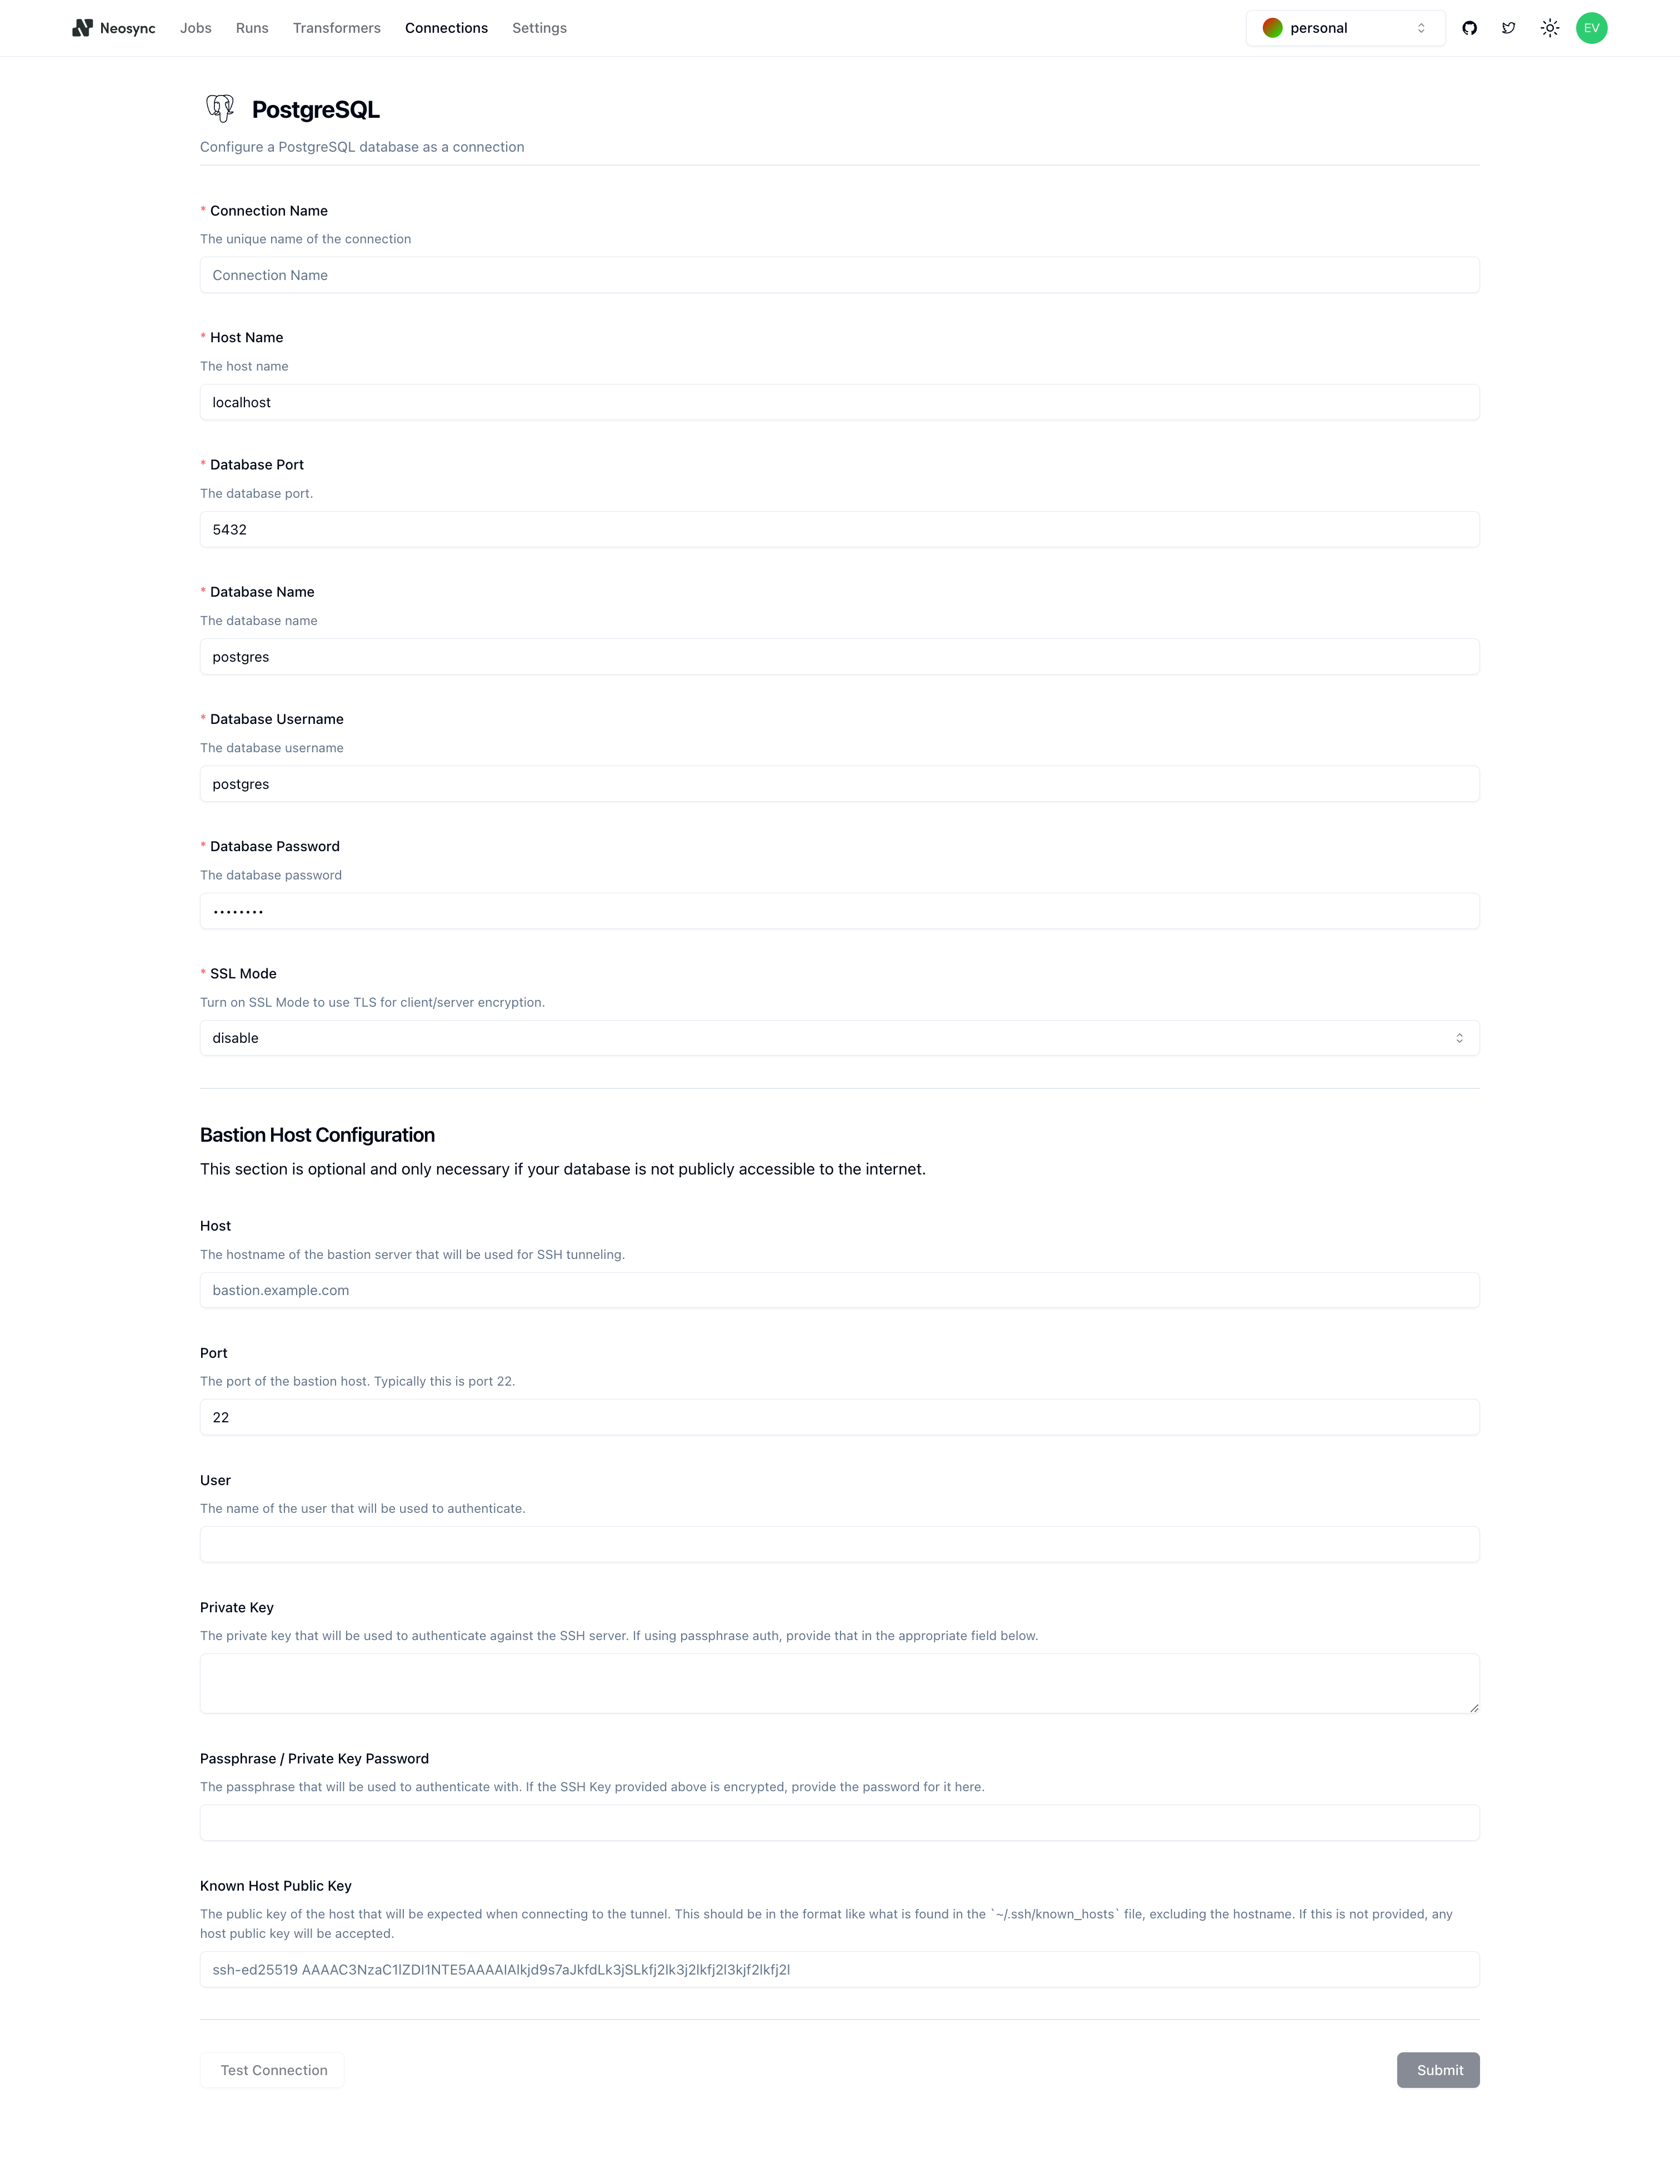
You should see the above form. Since our RDS database is public we can ignore the bottom part about configuring a Bastion Host. Let's go ahead and start to fill out our RDS connection string in this form. Here's a handy guide of how to break up the connection string and map it to the fields in the form.
| Component | Value | Description |
|---|---|---|
| Protocol | postgresql:// | Indicates a connection to a PostgreSQL database. |
| Username | evis | The username for authenticating the connection. |
| Password | ************ | The password for authentication (hidden for security). |
| Host | database-1.xxxxxx.us-west-2.rds.amazonaws.com | The hostname or IP address of the database server. |
| Name | neosync-test | The specific database name to connect to. |
| SSL Mode | sslmode=require | Specifies that SSL encryption is required for the connection. |
Once you've completed filling out the form, you can click on Test Connection to test that you're connected. You should see this if it passes:

Let's click Submit and move onto the last part.
In order to generate data, we need to create a Job in Neosync. Let's click on Job and then click on New Job. We're now presented with two options:
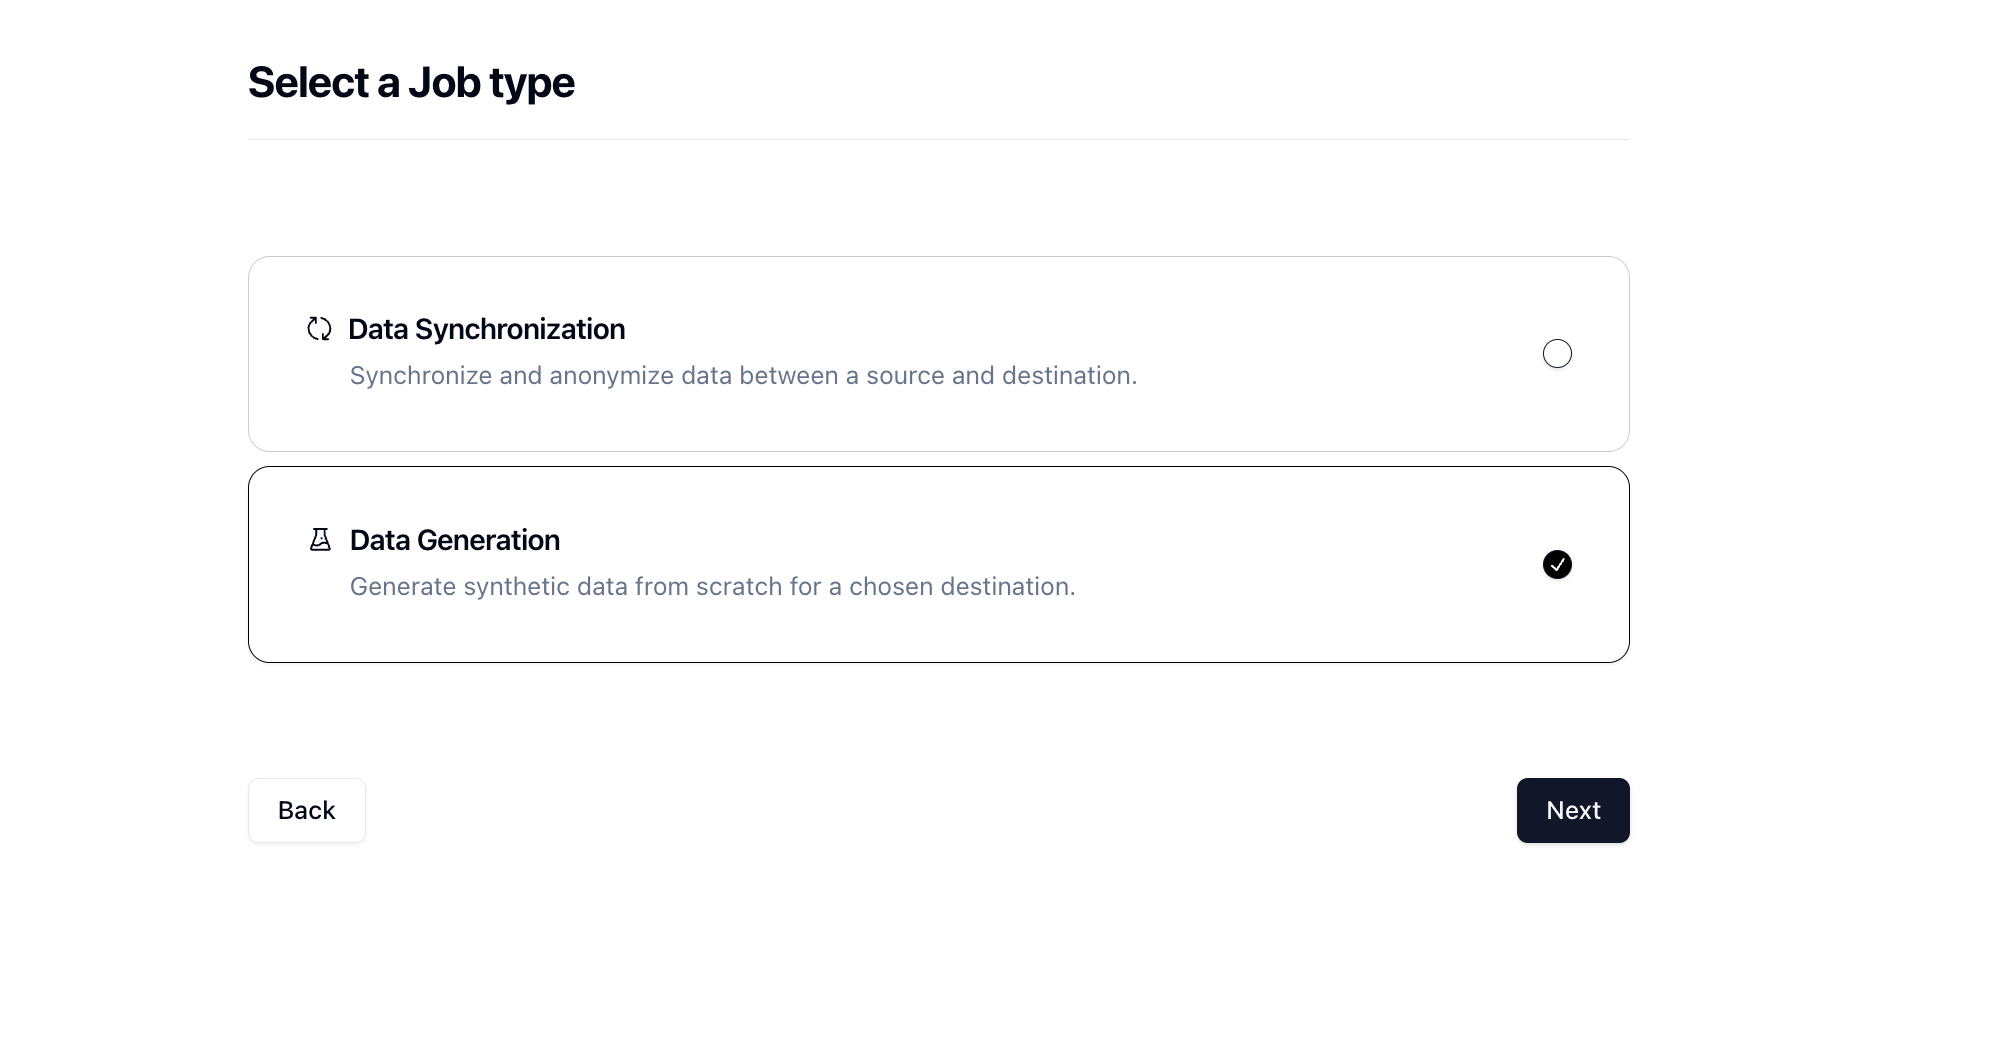
Since we're seeding a table from scratch, we can select the Data Generation job and click Next.
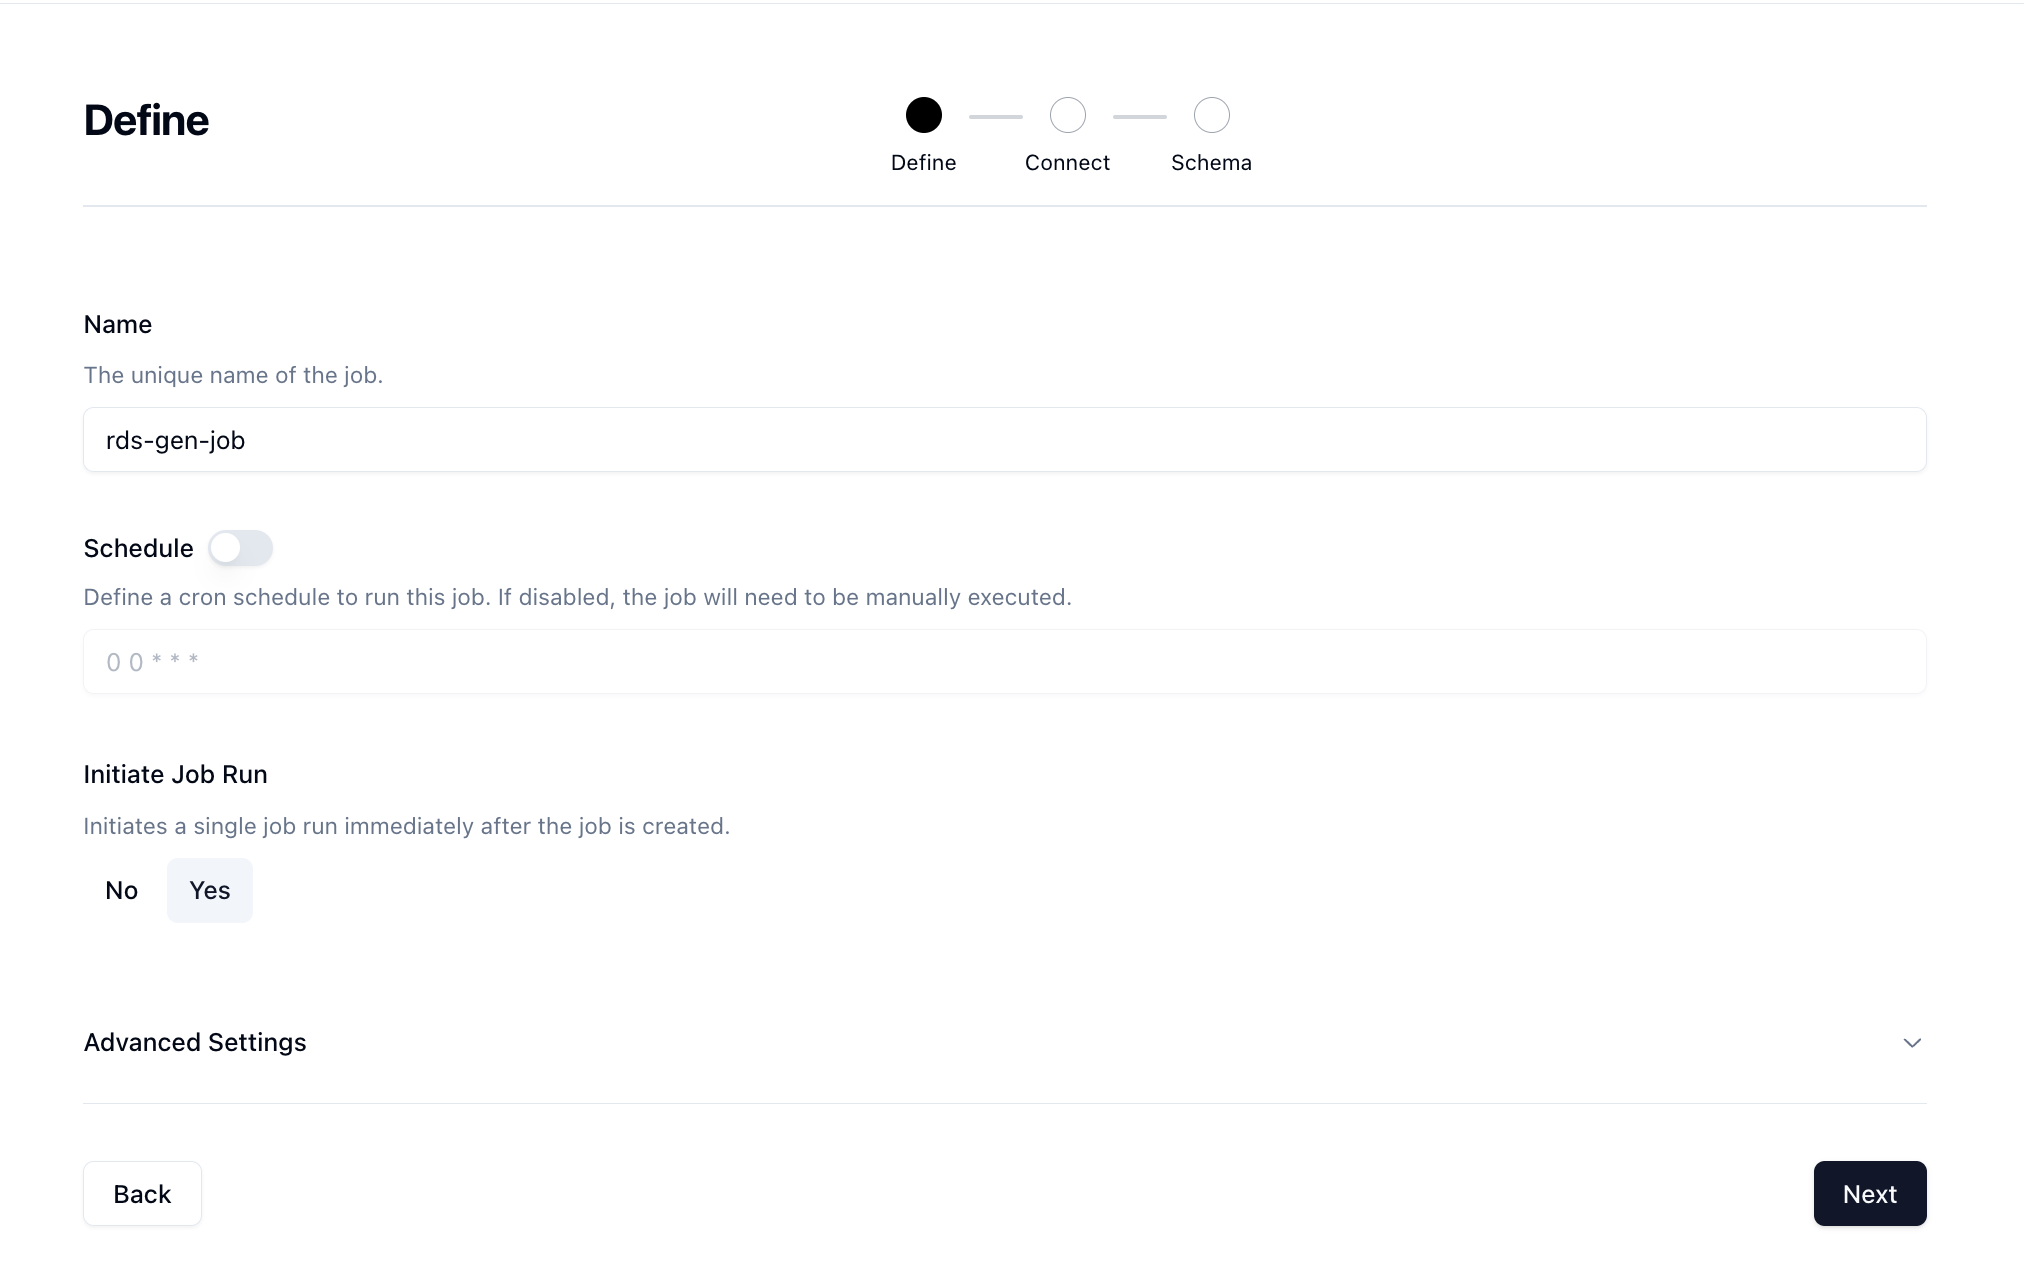
Let's give our job a name and then set Initiate Job Run to Yes. We can leave the schedule and advanced options alone for now.
Click Next to move onto the Connect page. Here we want to select the connection we previously connected from the dropdown.
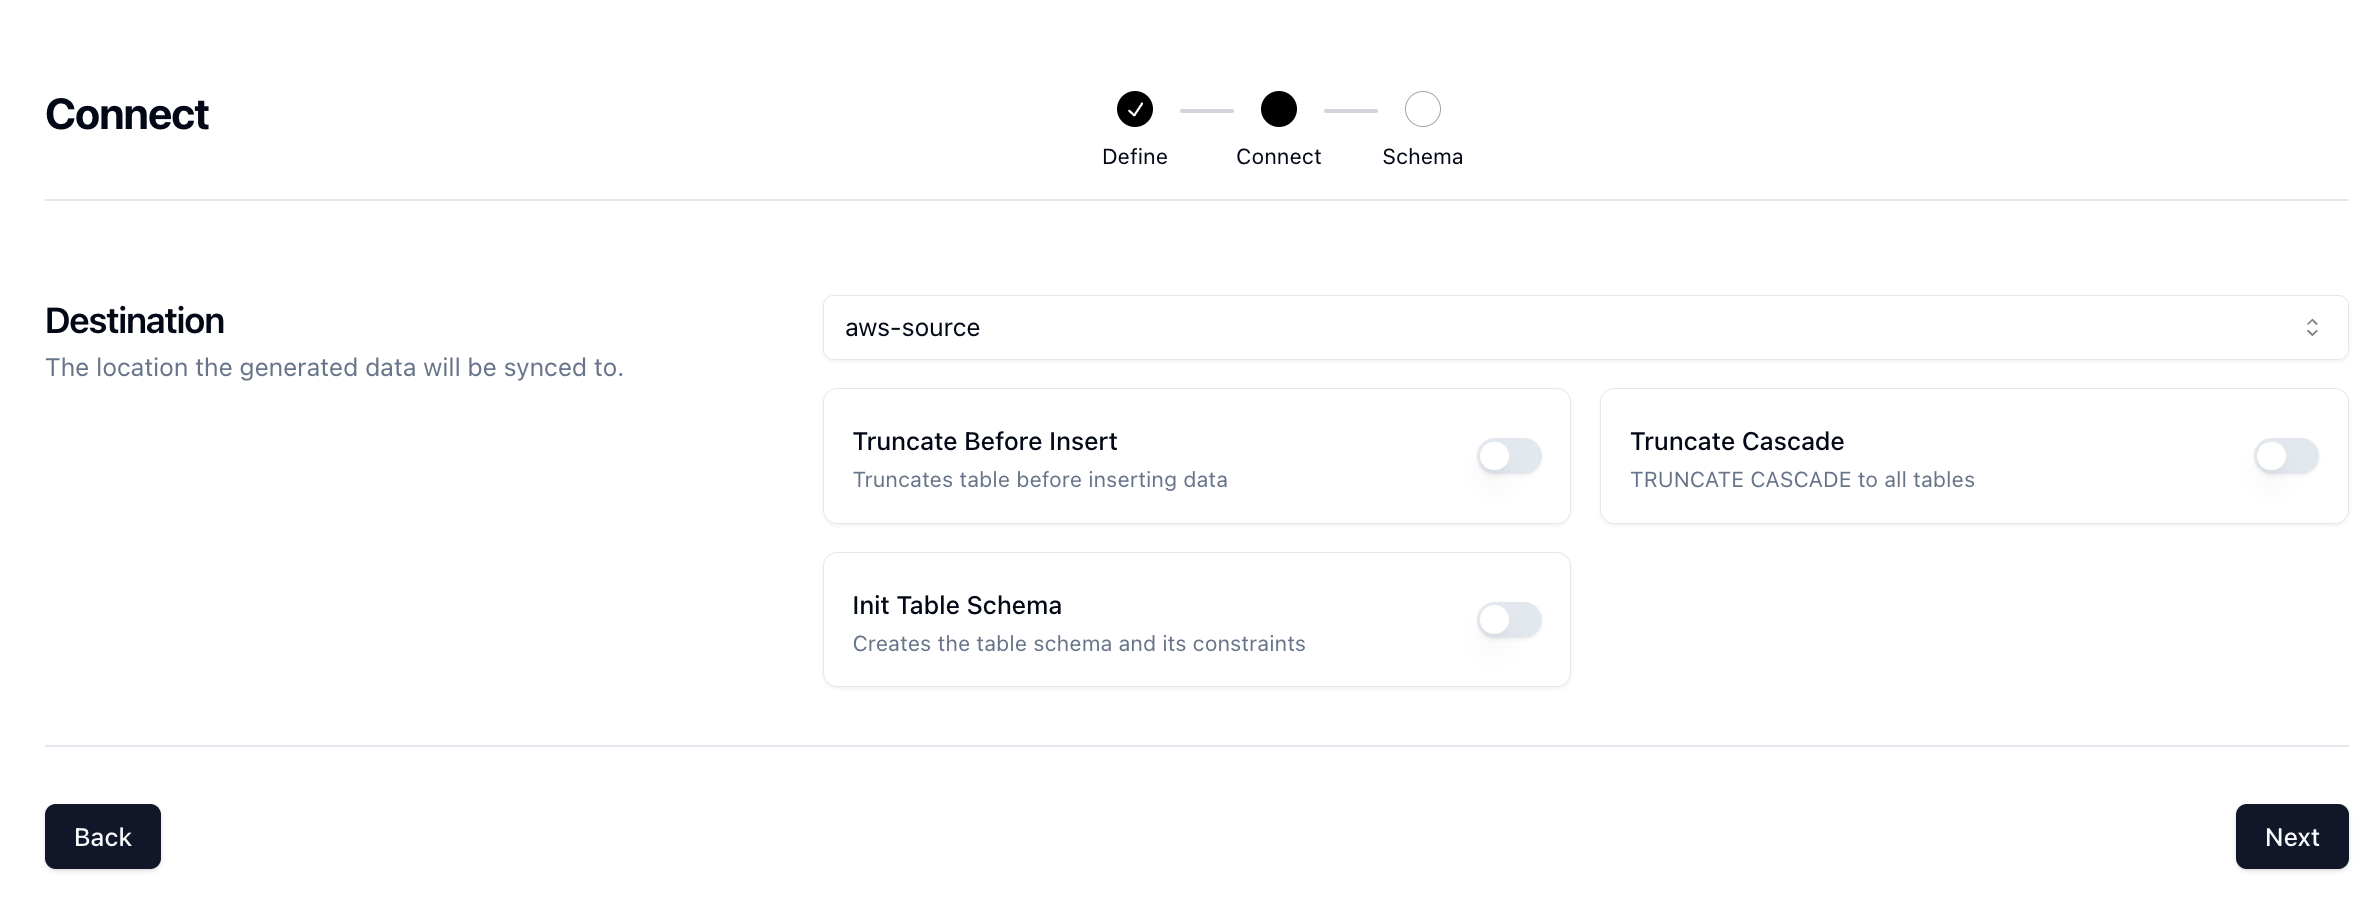
There are some other options here that can be useful but we'll skip these for now and click Next.
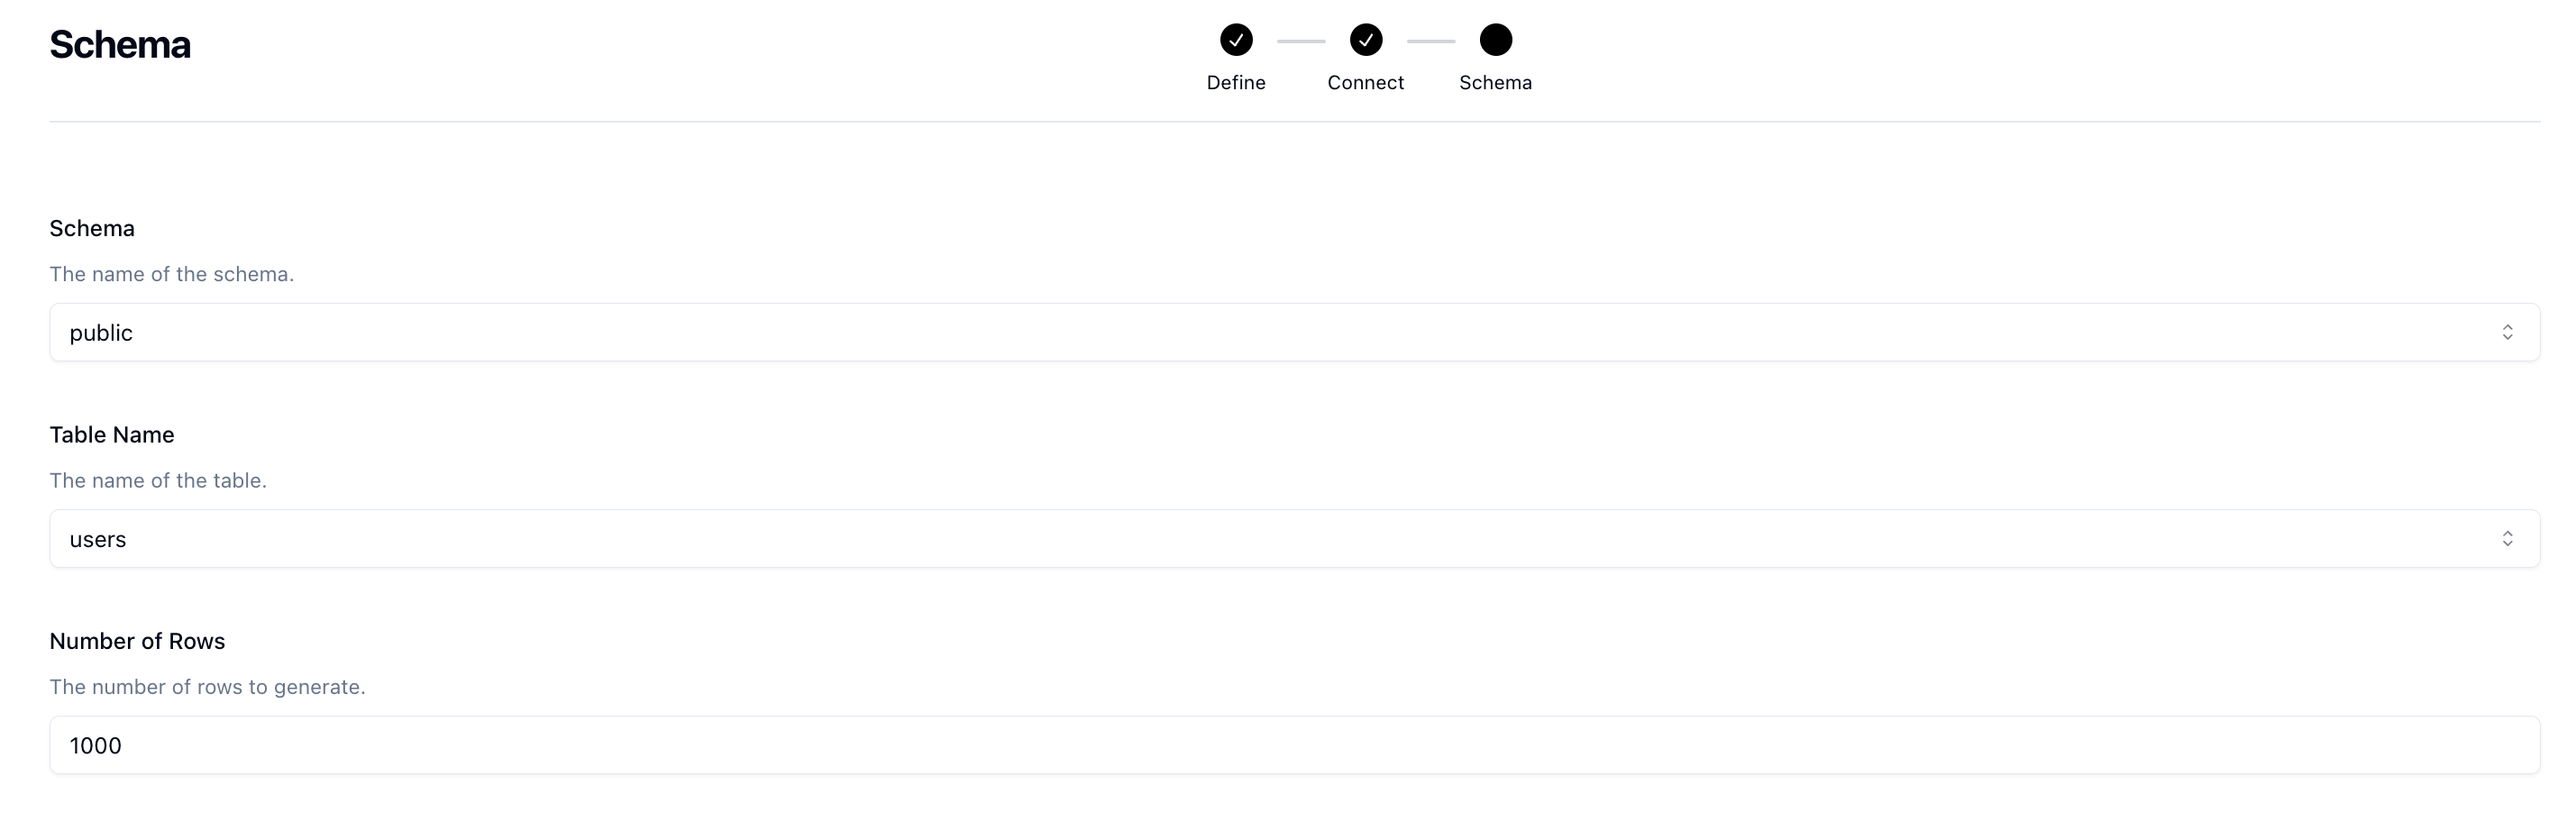
Now for the fun part. First select your schema. Mine is the public schema but you may have another one. Next select the table where you want to generate synthetic data. So I'm going to select the users table.
Next, decide how many rows you want to create. For this run, I'll do 1000 rows.
Lastly, we need to determine what kind of synthetic data we want to create and map that to our schema. Neosync has Transformers which are ways of creating synthetic data. Click on the Transformer and then select the right Transformer that maps to the right column. Here is what I have set up for the users table.

For the age column, I used the Generate Random Int64 Transformer to randomly generate ages between 18 and 40. You can configure that by clicking on the edit icon next to the transformer and setting your min and max.
Now that we've configured everything, we can click on Next and create the job! We'll get routed to the Job page and see something like this:
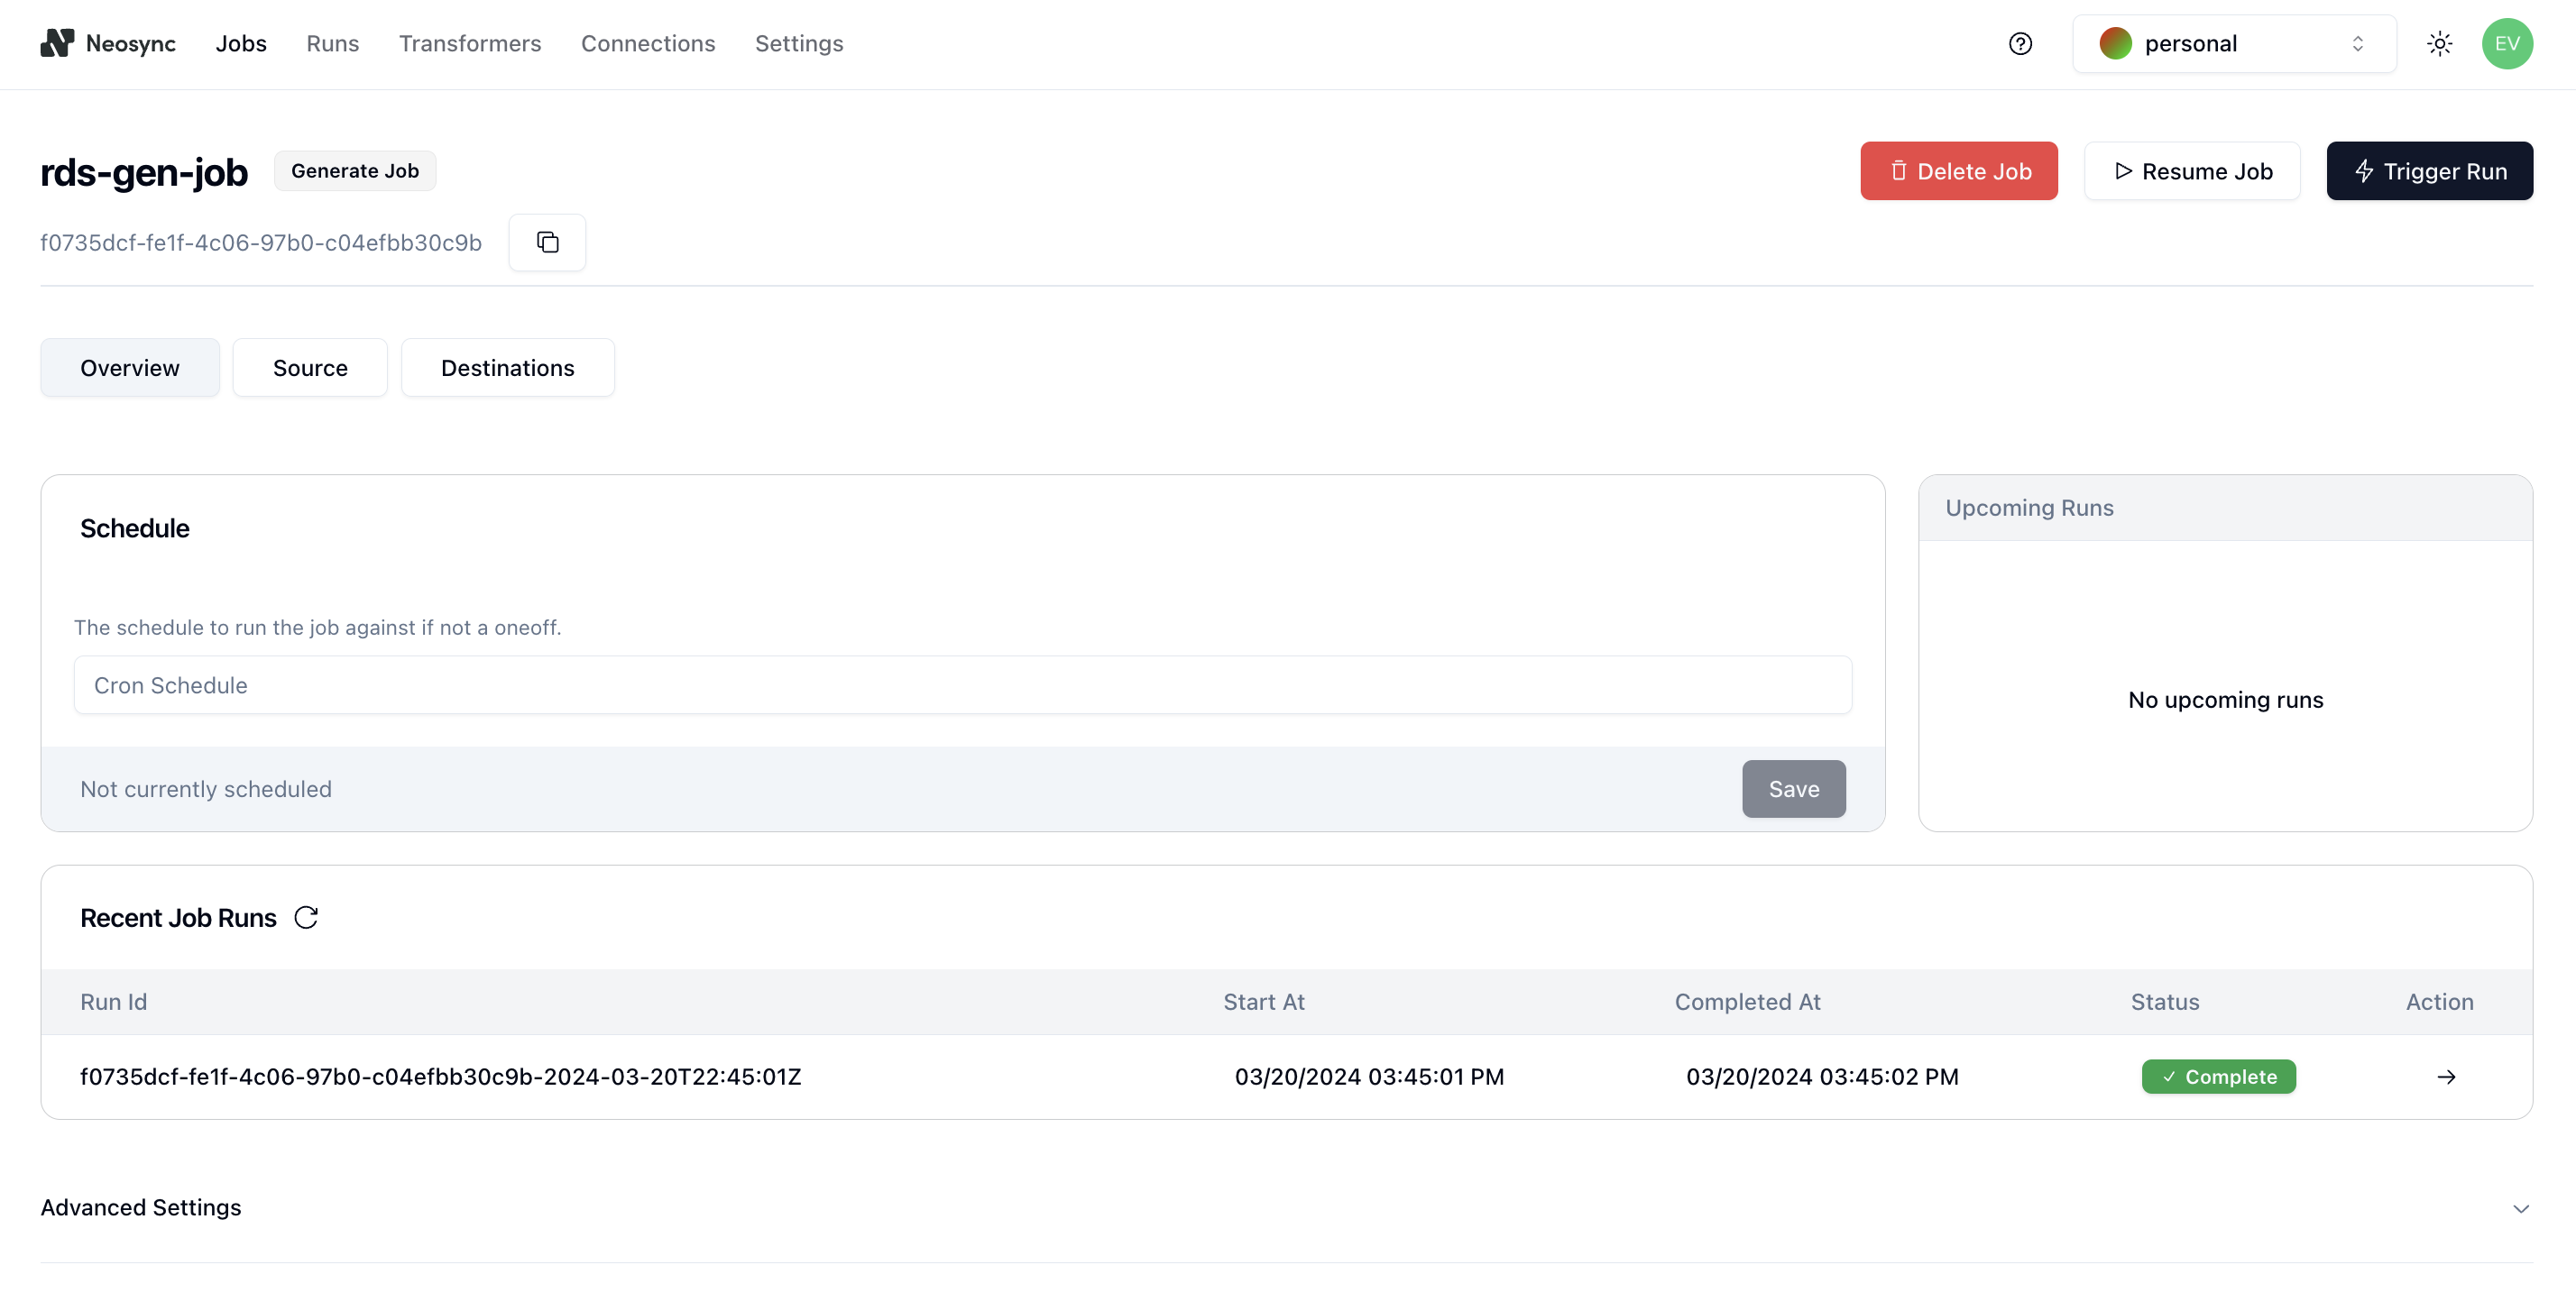
You can see that our job ran successfully and in just 1 second!
Now we can head back over to RDS and check on our data. First let's check the count and make sure we generated 1000 rows.
SELECT COUNT(*) FROM users;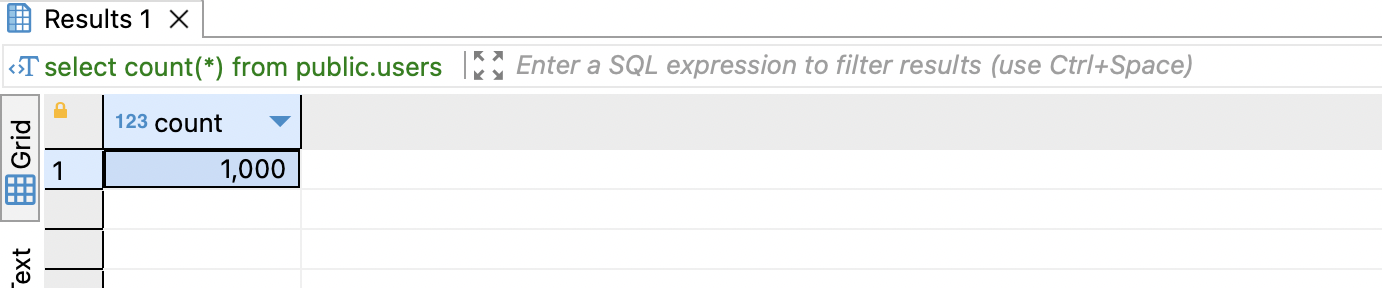
Next, let's check the data:
SELECT * FROM users;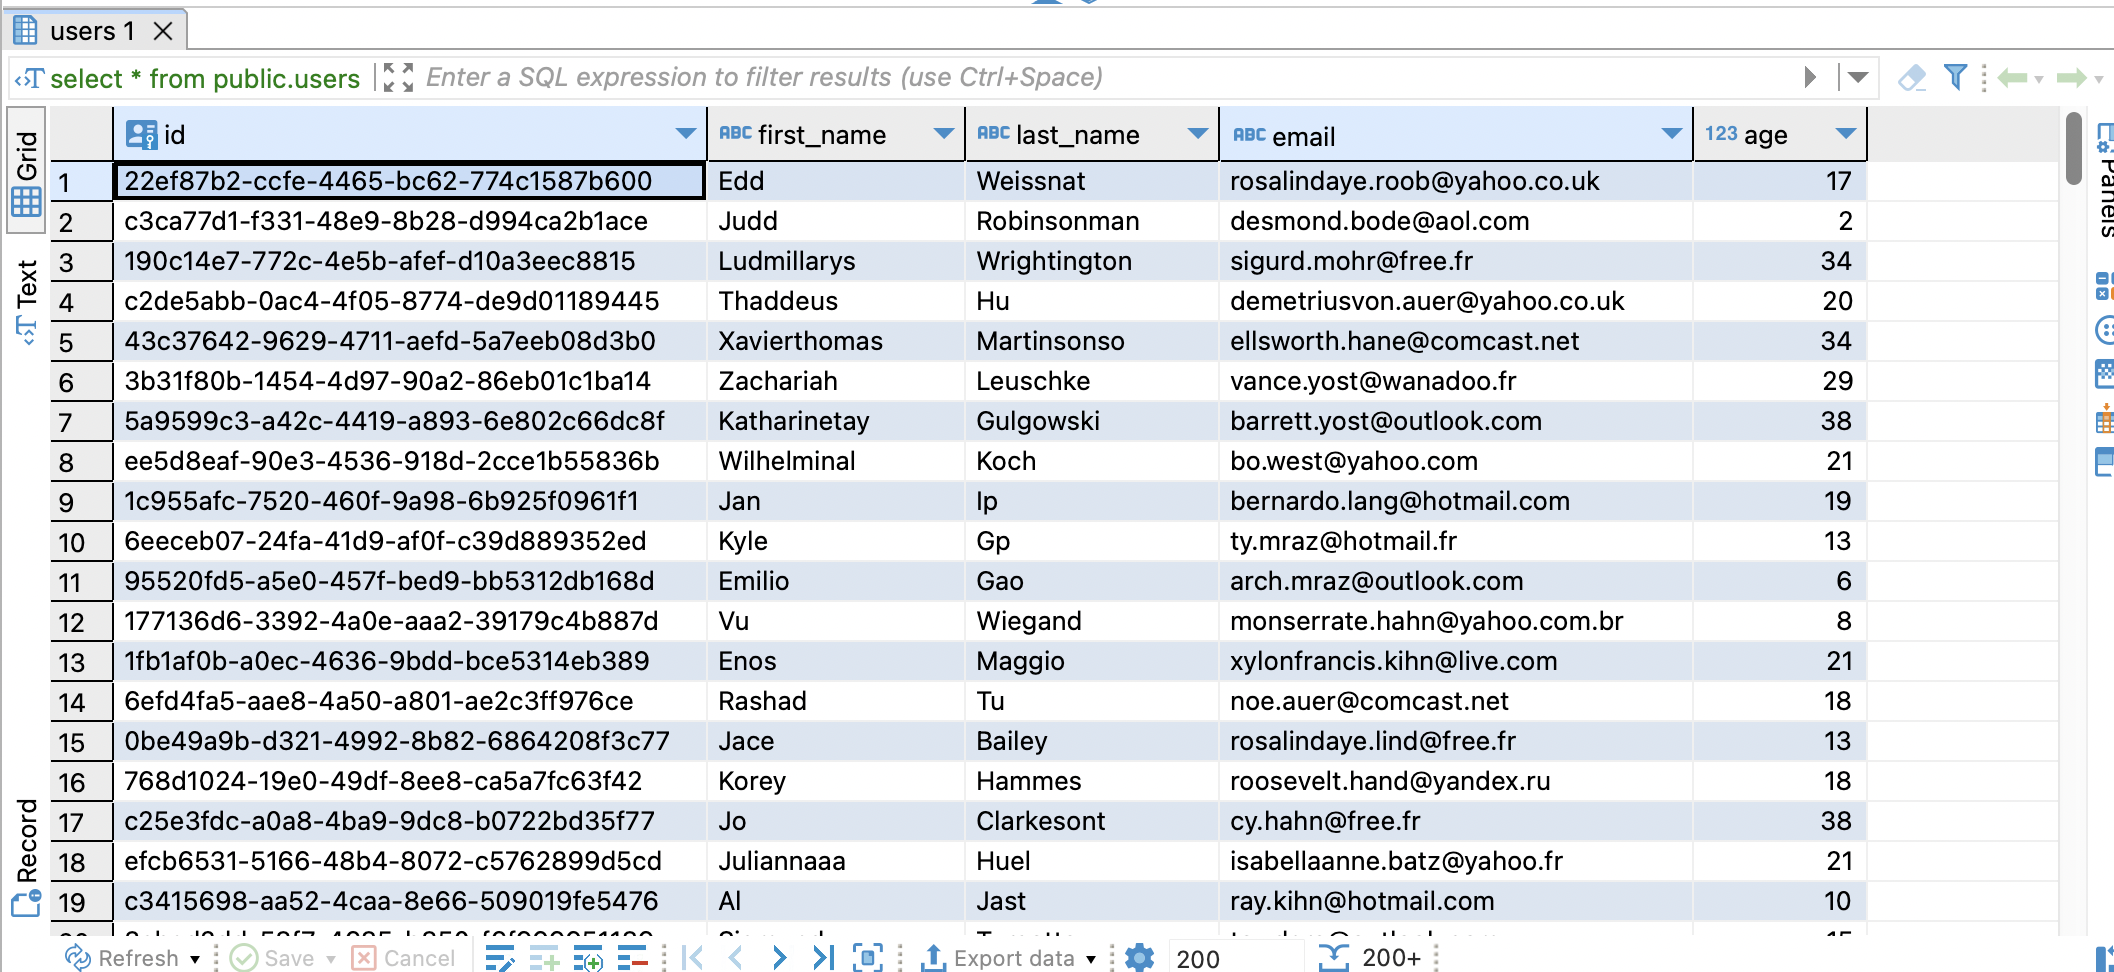
Looking pretty good! We have seeded our RDS database with 1000 rows of completely synthetic data and it only took 1 second.
In this guide, we walked through how to seed your RDS database with 1000 rows of synthetic data using Neosync. This is just a small test and you can expand this to generate tens of thousands or more rows of data across any relational database. Neosync handles the referential integrity. This is particularly helpful if you're working on a new application and don't have data yet or want to augment your existing database with more data for performance testing.
Top Open Source Alternatives to Tonic AI for Data Anonymization and Synthetic Data
March 31st, 2025

Top 4 Alternatives to Tonic AI for Data Anonymization and Synthetic Data Generation
March 25th, 2025

Nucleus Cloud Corp. 2025