Top Open Source Alternatives to Tonic AI for Data Anonymization and Synthetic Data
Top Open Source Alternatives to Tonic AI for Data Anonymization and Synthetic Data
March 31st, 2025
Developers love flexibility. They want to be able to do things their own way and transforming data is no different. Today I'm excited to give developers that flexibility in Neosync with Custom Code Transformers.
A Transformer is a data-type specific module that transforms data in some way. Transformers can be deterministic or probabilistic and can anonymize data and/or generate synthetic data. Neosync ships with 40+ transformers out of the box.

For example, a generate_float64 transformer, can generate random float64 values. Or the generate_email transformer can generate realistic-looking email addresses that are privacy-safe. The standard transformers that Neosync ships with are useful for some use-cases but how about when you want to transform the data in a custom way? This is where Custom Code Transformers come into play.
Custom Code Transformers are exactly what they sound like. Developers can write their own custom code to transform the data however they'd like. Let's take a look at an example.
Let's say that I have a users table that has the following columns: id, email, first_name, last_name, age. I can use Neosync here to sync this data from prod -> stage and anonymize the sensitive data. For the id, email, first_name, last_name columns, I can use the standard transformers while for the age column, I want to write a custom transformer.
In Neosync, I can go to Transformers -> New Transformer and select Transform Javascript.
![]()
I can give the transformer a name and description and then start to write the custom age transformer. All custom transformers are written in Javascript and have access to the standard library. We've integrated with Monaco, the underlying text editor of VSCode to offer to auto-complete, syntax highlighting, method definitions and more.
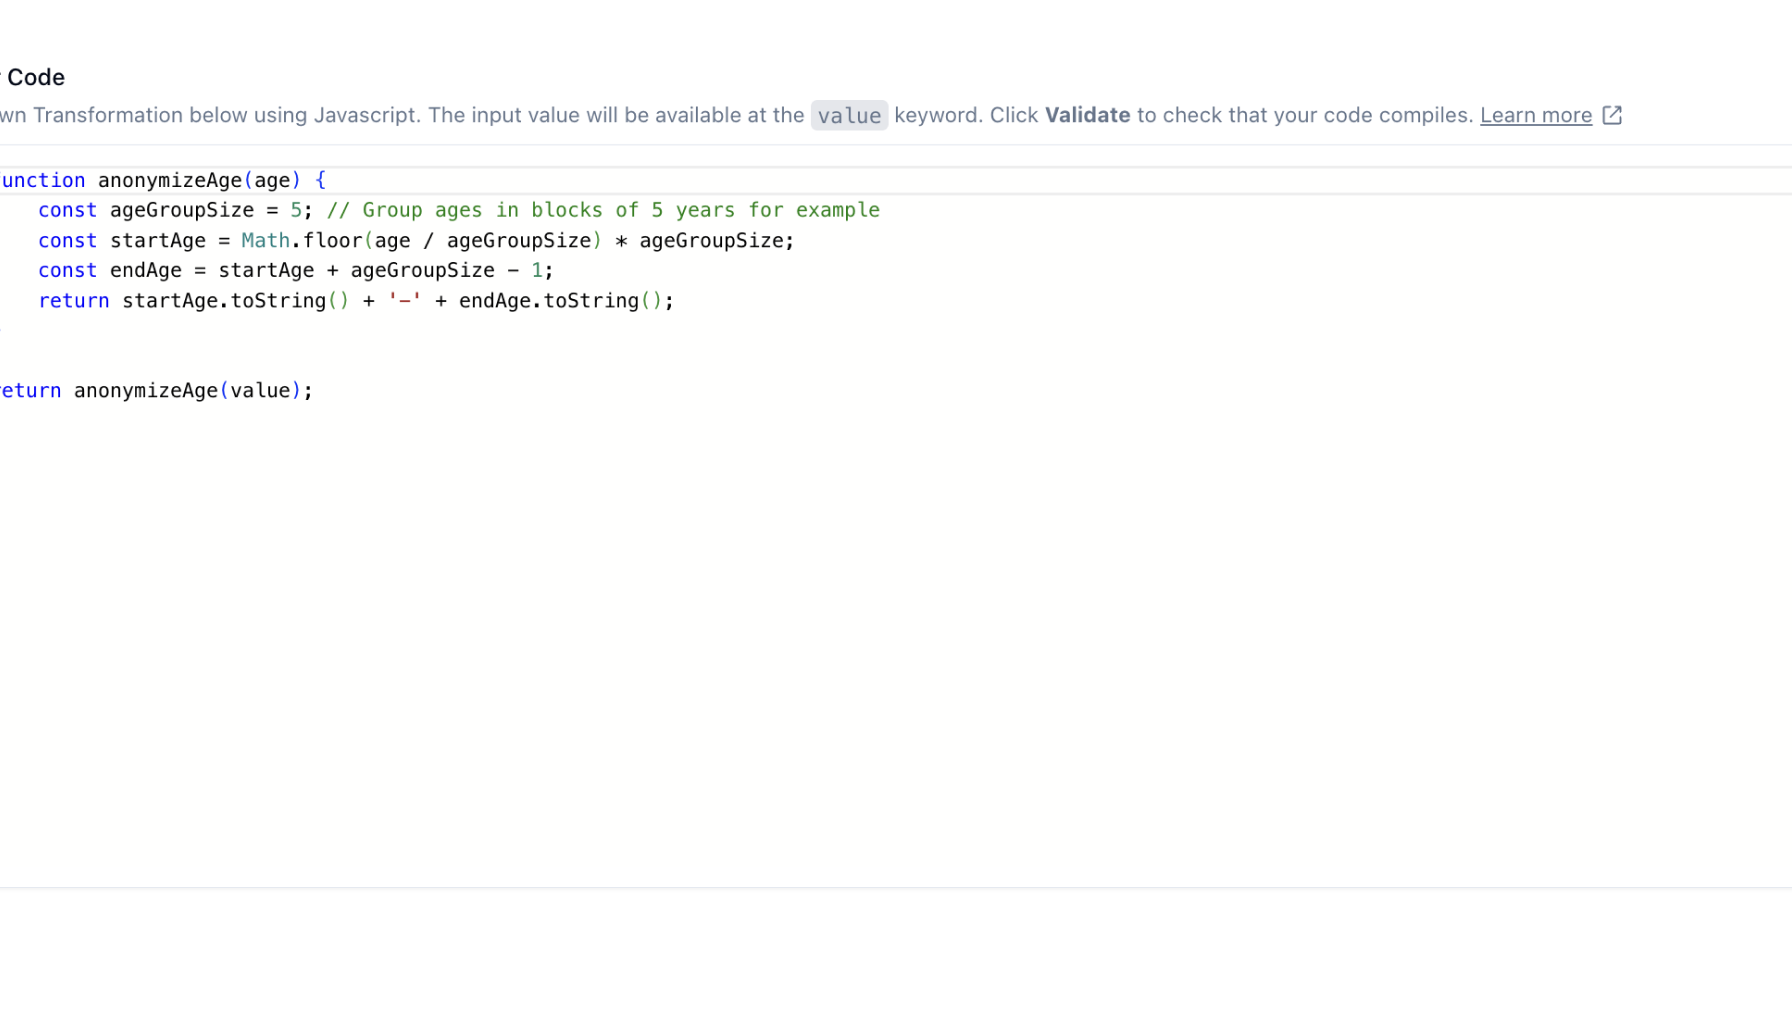
For this custom age transformer, we're going to anonymize our the age values, which come in as a string type, by bucketing them into 5 year age ranges. Here is the code:
function anonymizeAge(age) {
  const ageGroupSize = 5; // Group ages in blocks of 5 years for example
  const startAge = Math.floor(age / ageGroupSize) * ageGroupSize;
  const endAge = startAge + ageGroupSize - 1;
  const range = startAge.toString() + '-' + endAge.toString();
  return range;
}

return anonymizeAge(value);
We call the anonymizeAge function and pass in value as an argument. The value keyword is a special keyword and what you can use to access the value being transformed. Now that we've written our code we can paste it into the Transformer Code input box and click the validate button.

The validate button takes the custom code and attempts to compile it. If it successfully compiles then it returns valid. If it is unable to compile it will return invalid. This is a great way to check that your code can run before saving the transformer.

Once you've validated your code, you can click Save to save your transformer. Once successfully saved, you'll see it in the Transformers page.
![]()
Now that we've created our Custom Code Transformer, we can create a job to pull data from our source database, anonymize it and then sync it to our prod database. First, let's check our source database and look at a single row.

As we mentioned above, we have a users table that has the following columns: id, email, first_name, last_name, age. Now let's go ahead and create a job so we can use it. Our first step is to go to the Jobs page and click on + New Job.

Let's select the Data Sync job and then define our job.

Next, we can select our source and destination connections. We can select as many destination connections as we'd like but for this example we're going to just select our postgres staging database.

Next, the fun stuff. Neosync will automatically pull in the schema and we can configure our schema and transformers.

We can go through our schema and select our transformers for each column. For the age column, we can select our custom-age-transformer. Once we're ready, we can click on Next.

Lastly, we could configure Subset filters here. These filters allow you to flexibly filter a table or dataset. For this job, we'll just go ahead and click Submit to create our job. Since we configured our job to initiate a run on creation, our job will immediately trigger and after just a few seconds, we can check out staging database to see our transformed data.

We can see that our input age from our source database table had an age of 20 and now after passing it through our custom age transformer, it's bucketed into an age range of 20-24. Also, notice the other columns have changed as well as we generated synthetic data for those columns.
We've walked through how to create a Custom Code Transformer and use in it a job to anonymize age data. This is a simple example but you can make this can take this as s blueprint for a more complicated example with multiple tables, millions of rows and more.
This is just the first release and we're planning on adding more features here such as support for imports and adding types. So keep an eye out.
Check it and let us know what you think!
Evis
Top Open Source Alternatives to Tonic AI for Data Anonymization and Synthetic Data
March 31st, 2025

Top 4 Alternatives to Tonic AI for Data Anonymization and Synthetic Data Generation
March 25th, 2025

Nucleus Cloud Corp. 2025